Adding a fireplace changes how a home feels and functions. It shifts a room’s center of gravity toward warmth and conversation, and it reshapes your energy mix in winter. Done well, a fireplace installation boosts comfort, raises resale appeal, and can lower heating costs by letting you zone-heat the spaces you actually use. Done poorly, it creates headaches: smoky rooms, condensation in the flue, or the kind of draft you notice every time the wind kicks up. The difference lies in careful planning, honest sizing, and crisp execution.
I have stood in cold living rooms with clients who swore their new unit “just doesn’t heat,” only to find an oversized insert cycling on and off or a venting path that fights physics. I have also watched modest gas fireplaces heat large, open-plan rooms with quiet reliability for more than a decade. The common thread is fit and follow-through. What follows is a practical walk from first idea to that first controlled flame, with trade-offs explained and pitfalls flagged before they cost you.
Start with intent, not equipment
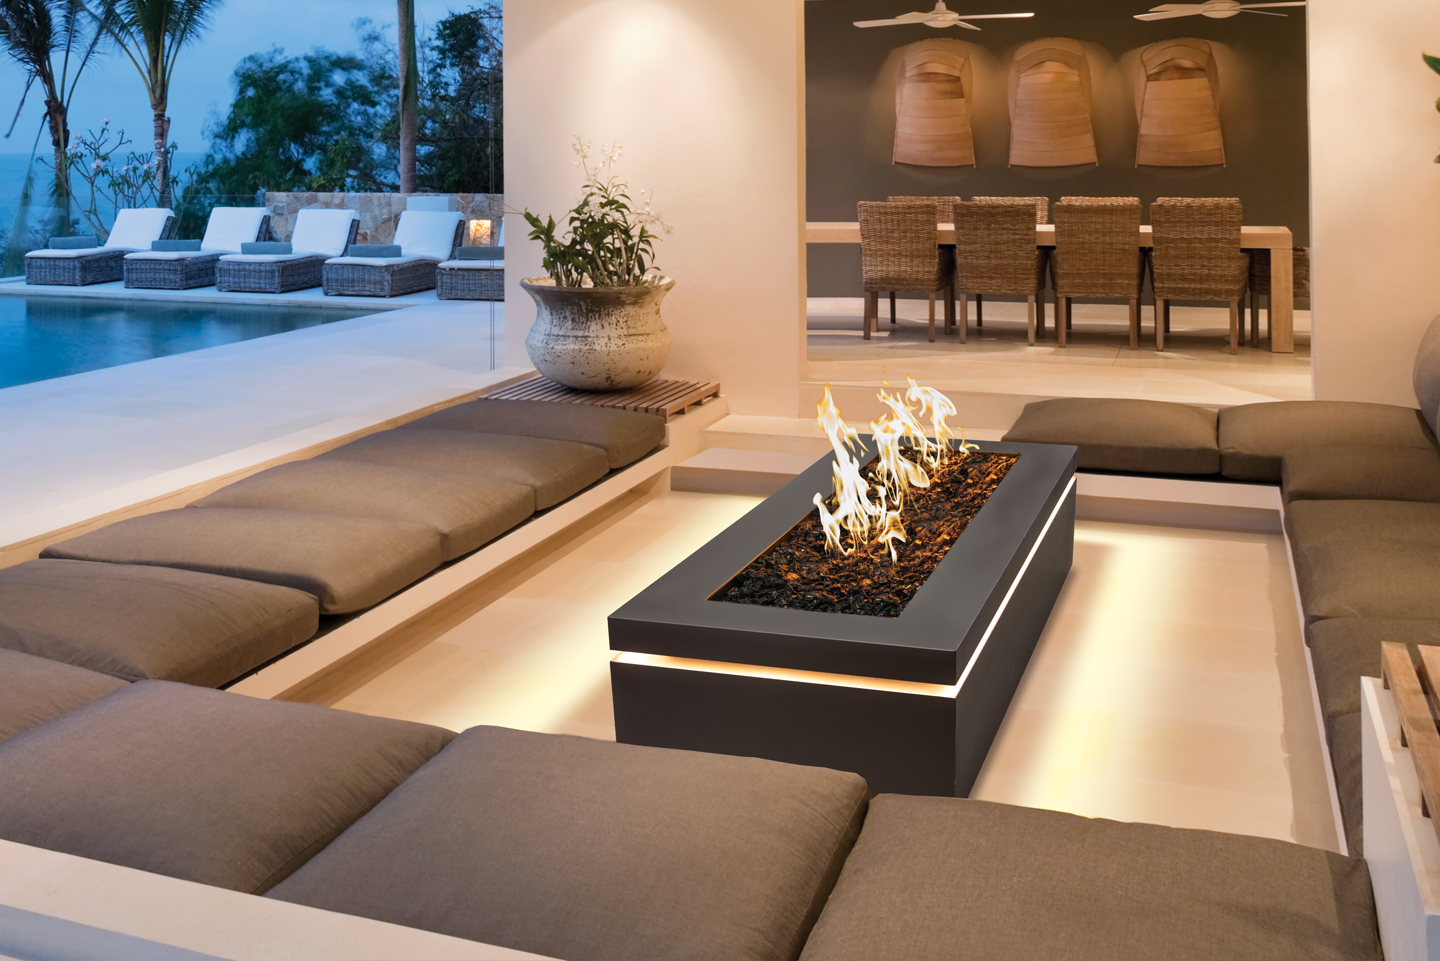
Every good fireplace project starts by asking what problem you’re solving. Heat, atmosphere, efficiency, or a combination. Some homeowners want a focal point and occasional supplemental heat for holidays. Others want to chop their gas bill in half by heating the family room most evenings and letting the central furnace idle. The right answer will push you toward a category before you ever pick a style.
A traditional open wood fireplace adds drama and the smell of a Saturday fire, but it’s the least efficient option by far. When the damper is open, that brick chimney is a highway for heated air to escape, and the net efficiency is often negative. If your heart is set on wood ambiance with real heat, a wood-burning fireplace insert inside a sound masonry firebox flips the equation. Inserts run closed-combustion, so they pull outside air for the burn, extract heat with a secondary chamber, and return very little smell or particulate to the room.
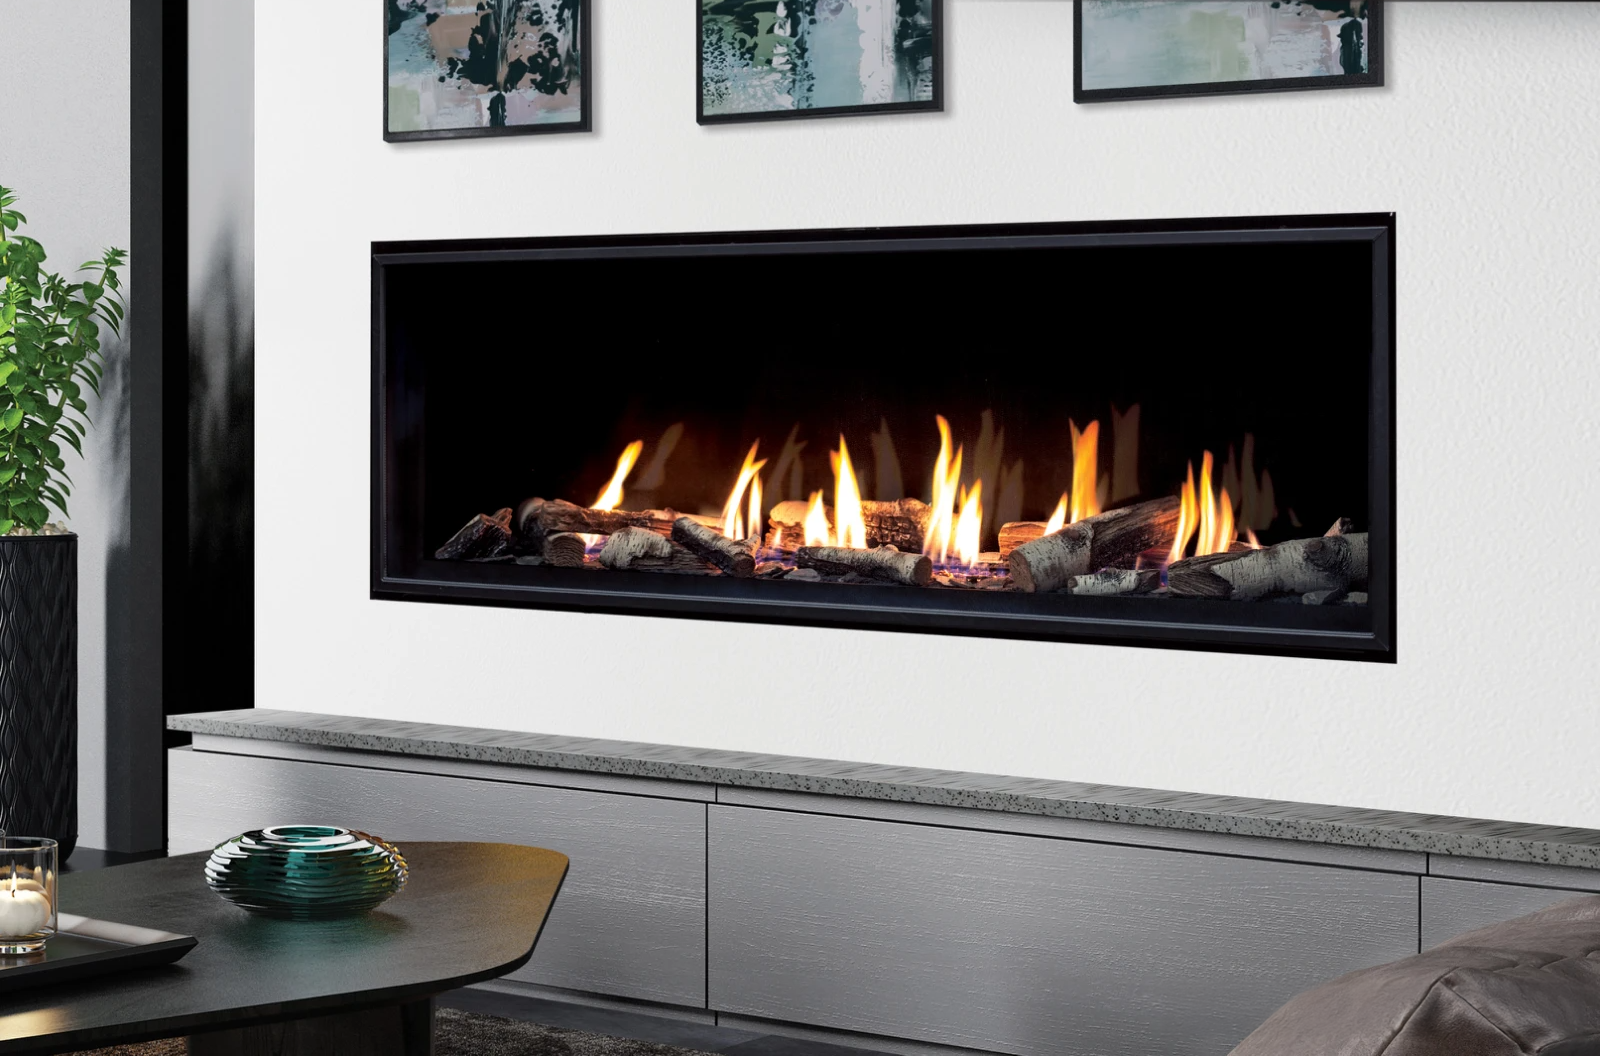
A gas fireplace, whether a built-in unit or a gas fireplace insert in an existing masonry opening, offers ease and control. Click the wall switch, set the thermostat, and the flame responds. Modern gas fireplaces reach efficiencies in the 70 to 85 percent range, depending on venting and design. They also solve makeup air and draft in a predictable way, which matters in tight, newer homes.
An electric fireplace insert gives you the look, plus safe supplemental heat, without a gas line or chimney. Electric fireplace inserts are the simplest to install, especially in multi-family buildings where venting is limited. They can’t match the BTU output of larger gas fireplaces, but in smaller rooms or bedrooms, they deliver steady comfort and year-round ambiance because you can run the flame effect with the heater off.
It’s fine to blend priorities, just be honest about what matters most. The decision you make here drives choices downstream: venting path, clearances, power, and budgets.
Site selection, clearances, and the reality check
Stand in the room where you want the fireplace and look up, then look behind and below. That sightline tells you a lot about feasibility. If the best spot faces an exterior wall, you have more venting options for gas fireplaces and convection airflow for inserts. An interior wall means a longer vent run and possibly more structural work. An upstairs room adds weight and framing considerations, and in some homes you’ll need a hearth pad that can handle 350 to 500 pounds without deflection.
Clearances are not suggestions. Application manuals specify distances to combustibles, mantel heights, and hearth extension depths for different floor materials. Those numbers exist because paint, drywall, and engineered wood behave very differently when exposed to sustained radiant heat. I have seen beautiful mantels blister because someone shaved an inch off a listed clearance to get a TV lower on the wall. Manufacturers give tested dimensions for a reason, and building inspectors will check them.
Think about how people will move through the room. A hearth that projects too far can trip kids coming off a sectional. A floor register in front of the unit can rob you of heat as it convects right into the return duct. Fireplaces work best when they have space to breathe and an air path that doesn’t fight the rest of the home’s HVAC.
Sizing the unit: heat load, not guesswork
Sizing should be a calculation, not a hunch. The aim is to match output to the heat loss of the room or zone you intend to heat. For rough planning, a moderately insulated living room of 350 square feet might need 8,000 to 12,000 BTU per hour to maintain temperature on a cold evening. A large, open space of 600 to 800 square feet can call for 18,000 to 30,000 BTU, depending on ceiling height, window area, and climate. Oversize the unit and you’ll cook the space on low before the rest of the house warms. Undersize it and you’ll run the unit hot and still feel cool corners.
A quick field method uses a heat loss calculator with inputs for square footage, window exposure, insulation level, and design temperature. If you’re unfamiliar with those terms, a licensed installer or HVAC pro can run the numbers and frame options in five minutes. With a target BTU in hand, you can compare gas fireplaces, a gas fireplace insert, or a wood or electric fireplace insert on more than looks.
For masonry fireplaces getting an insert, measure the firebox width, height, and depth at several points. Masonry work rarely holds perfect lines, and inserts need an inch here or there for surrounds and liners. The flue size and condition matter too. Small clay tiles or offset flues change which liner diameters can snake through without demolition.
Permits, codes, and inspections that matter
Fire features are regulated for safety. That applies whether you’re installing a vented gas fireplace, a direct-vent gas fireplace insert in a brick opening, or an electric fireplace insert with a dedicated circuit. Expect permits for gas and venting work, and for electrical circuits in many jurisdictions. This isn’t busywork. Permits create a record for future buyers and insurance, and they trigger inspections that catch problems before they become hazards.
![]()
A competent contractor will pull the permit and schedule inspections. If you’re coordinating yourself, ask your local authority what they require. In many areas, gas-fired equipment needs a mechanical permit, a gas pressure test, and a final. A new exterior cap or penetration often requires a simple building permit. Electric inserts that run from a nearby outlet may not trigger a permit, but any new circuit does. Keep that paper trail clean.
Two inspections deserve special attention. First, chimney inspections. If you’re using a masonry fireplace as a host for a gas fireplace insert or wood insert, have a Level 2 inspection performed before you even order equipment. That means a camera inspection of the flue from top to bottom, plus a check of the smoke chamber, damper, and crown. Cracked liners, misaligned tiles, and smoke shelf defects are common in older homes. Fixing them during the installation is simpler than pulling a unit later. Second, a gas line pressure test if you’re running a new branch. Gas leaks hide behind walls; pressure tests surface them before drywall closes.
If you live near West or are working with a regional expert, a west inspection chimney sweep or a reputable chimney cleaning service often bundles inspection, cleaning, and liner recommendations. The pairing is smart: you get the soot and creosote out before installing, and you exit with a written condition report. For new gas fireplaces, the service may be shorter but still useful, especially if the existing chimney crown or cap needs attention to handle a new direct-vent termination.
Venting decisions: natural draft, direct-vent, or none
Venting is the spine of a safe and efficient fireplace installation. The route, diameter, and termination affect flame stability, glass cleanliness, and combustion efficiency.
Natural draft, used in open wood fireplaces, relies on a tall, warm chimney to pull exhaust upward. It is elegant when everything aligns: tall stack, warm flue, steady air supply. It is also least predictable. Wind, stack effect in tight homes, and cool masonry can reverse or stall draft. A wood-burning insert inside that masonry envelope changes the game by using a stainless liner with a defined diameter. The insert’s baffle and liner work as a tuned system, and exhaust behavior becomes predictable.
Direct-vent gas fireplaces and gas fireplace inserts use a co-axial pipe, one tube inside another, to draw outside air in and exhaust flue gases out. No room air is used for combustion, which avoids negative pressure and indoor air concerns. Horizontal runs through an exterior wall are common in first-floor installations. Vertical runs can go up through a roof with specific height and distance rules from ridges and windows to avoid recirculation. Follow the unit’s vent chart strictly. Exceed the total equivalent length with too many elbows, and you’ll chase nuisance flame-out issues forever.
Vent-free gas units exist, but I do not install or recommend them in most homes. Even when technically compliant, they introduce moisture and combustion byproducts into living spaces. Indoor air quality standards are improving for good reason. Direct-vent units are clean, efficient, and only marginally more complex to install.
Electric fireplace inserts avoid venting entirely. That simplicity is a real advantage in condos and interior rooms. The trade-off is heat output. Most electric units deliver 1,500 watts, roughly 5,000 BTU. That is excellent for a den or bedroom and as a zone supplement. It will not replace a 25,000 BTU gas fireplace in a large, open space.
Gas, electric, wood: a clear-eyed comparison
For homeowners choosing between categories, parse more than initial cost. Think in ten-year timelines.
Gas fireplaces cost more upfront due to venting, gas line work, and cabinetry or finishing. They pay you back in convenience and steady, controllable heat. Maintenance is light: annual https://ricardotgjp152.image-perth.org/fireplace-inserts-vs-gas-fireplaces-cost-and-performance service to clean the glass, check the pilot or ignition system, inspect the vent, and verify manifold pressure. When properly sized, a single gas fireplace can carry the load of a family room all winter, and in shoulder seasons it may be the only heat you use at night.
A gas fireplace insert inside an existing masonry opening occupies an efficient sweet spot. You keep the original hearth location and upgrade the efficiency dramatically. Direct-vent inserts often install in one to two days with minimal disruption. Sizing and surround selection matter so the finished look suits the room without awkward gaps.
Electric fireplace inserts win on simplicity. A unit often plugs into a standard 120-volt outlet, though some larger models benefit from a 240-volt circuit. Flame technology has improved. The better units have adjustable color, variable ember beds, and convincing depth. Operating cost depends on electricity rates, but many homeowners run flame-only much of the year and turn on heat just when needed.
Wood-burning inserts transform a drafty masonry fireplace into a real heater. Expect more work upfront: chimney inspections, stainless liner installation, a block-off plate in the smoke chamber to prevent heat loss, and a hearth extension if your floor covering is combustible. In return, you get high output, long burns with seasoned hardwood, and independence from gas and electricity. Wood heat asks you to be part of the process: stacking, seasoning, and ash cleanout. Some people love that ritual.
Coordinating trades: who does what and when
A well-run project has a rhythm. The order below favors a clean workflow and predictable inspections:
- Design and selection: choose the unit type, size, surround, and venting path; confirm clearances, finishes, mantel, and hearth dimensions. Permits and inspection prep: pull permits, schedule chimney inspections, and, if needed, a chimney cleaning service; plan for any framing changes. Rough-in: install gas line and shutoff, rough electrical if needed, frame chase or bump-out, and cut the vent penetration; perform pressure test for gas. Unit set and venting: place the fireplace or insert, connect venting and liner, set termination cap, and seal penetrations per manufacturer specs. Finish and commissioning: install surround and trim, connect electrical controls or thermostats, complete rock or tile work, then run through startup, adjust flame and air shutters, and book the final inspection.
This sequence keeps the messy work early and the finish work clean. It also ensures you can fix a vent or liner issue before surrounding it with stone.
Safety details that separate good from great
Small choices determine how a fireplace behaves after five winters. A few that come up often:
- Fresh air and makeup air for tight homes. Even with direct-vent equipment, tight houses benefit from balanced ventilation. If the range hood moves a lot of air or the dryer runs long cycles, negative pressure can interfere with draft on marginal vent paths. A simple test with a manometer during commissioning is cheap insurance. Proper liners for inserts. A gas fireplace insert in a masonry fireplace needs a listed stainless liner from the unit to the cap, correctly sized and insulated if the chimney runs outside the thermal envelope. Too many installations rely on a partial liner or a mismatch in diameter that causes condensation. Water streaks on the brick in spring are a sign something is off. Mantel and TV placements. The manual’s heat deflection diagrams matter if you plan to mount a TV above. Sometimes a modest heat deflector or a mantle with the correct projection keeps surface temperatures within limits. I take a quick infrared thermometer reading after one hour of high-fire to verify. CO alarms nearby. If you add a gas fireplace, add or test carbon monoxide alarms on that floor. Modern direct-vent units are remarkably clean, but devices fail, and alarms are cheap. Glass handling and child safety. Tempered glass on gas fireplaces gets hot, especially during the first 20 to 40 minutes of operation. Many manufacturers offer screens or double glass with convection airwash. If you have toddlers, budget for the screen kit.
The installation, step by step
Although each home is different, the core steps for a gas fireplace insert and a built-in gas fireplace share a spine. Here is a concise walkthrough for each scenario.
Installing a gas fireplace insert in an existing masonry fireplace:
- Pre-inspection and prep: perform chimney inspections, sweep as needed, confirm the firebox dimensions, check the damper and smoke shelf, and verify electrical access if using a blower or remote module. Liner drop and termination: from the roof, lower the co-axial liner or a pair of flexible liners, depending on the model. Secure a proper top plate and cap sized for the liner. On tall chimneys, insulate the liner to improve draft and reduce condensation. Block-off plate: fabricate and install a metal plate at the throat or smoke shelf, sealed with high-temp silicone. This prevents heat from rising into the chimney cavity and directs it into the room. Gas line and electrical: run a gas line with a shutoff in the firebox or adjacent cavity, test for leaks, and route a 120-volt circuit if required for the blower. Use a concealed conduit if route aesthetics matter. Set the insert: slide the gas fireplace insert into the opening, connect the liner, gas, and wiring, and verify clearances for surround and face. Level the unit to the hearth. Commissioning: light the pilot or spark system, set the flame, adjust air shutter if the flame tips show yellowing or sooting, check manifold pressure, and test the blower and remote. Install the surround, then run the unit at high for 30 to 60 minutes to cure the paint and burn off solvents.
Installing a new direct-vent gas fireplace on an interior or exterior wall:
- Layout and framing: mark the unit footprint, maintain clearance to combustibles, and build the platform and wall framing, including any chase needed to hide venting. Rough-in for TV recesses or built-ins now if planned. Vent planning: choose the vent route, calculate equivalent lengths with elbows, and cut penetrations. If running vertical, ensure roof clearances above snow line and away from dormers. If horizontal, respect termination distances from windows, doors, gas meters, and corners. Gas and power: run the gas line to the unit location and install a shutoff and drip leg. Pull electrical for ignition, blower, accent lights, or smart controls. Label everything before drywall. Set and connect: place the unit, secure to framing, connect venting with high-temp sealant where specified, and strap and support long runs. Keep a slight pitch upward on horizontal runs as the manual requires. Seal and finish: complete drywall or cement board, set non-combustible surrounds, tile or stone, and mantel. Leave the access panel clear and serviceable. Then commission the fireplace: check ignition, air shutter, glass seal, and safety switches, and confirm combustion with a steady blue flame baseline and soft yellow tips on high.
Electric fireplace insert steps are shorter: confirm electrical capacity, route the circuit, set the unit in the opening or framed cavity, secure, and finish. The most common mistakes are undersizing the circuit when multiple devices share it, and boxing the unit into a cavity without the recommended ventilation.
Finishes that age well
Stone, tile, shiplap, steel, and plaster can all work. The best finishes respect heat and movement. Natural stone takes the heat cycles with grace, though thickness adds weight. Porcelain tile is a quiet performer. Painted wood above the unit can work if you maintain clearances and design a reveal that shades the surface from direct radiant heat. Metal surrounds carry heat, so a modest stand-off from adjacent materials helps prevent ghost lines in paint.
I recommend testing a mantel height with blue tape on the wall before committing. Sit where you watch TV, lower the tape a few inches at a time, and feel where the sightline is natural. Then measure that position against the unit’s clearance chart. Adjust the finish plan to protect the screen rather than forcing a TV into a hot zone.
Budgeting, timelines, and what surprises cost
Budget ranges vary by region, but patterns hold. A quality electric fireplace insert with finish carpentry might land between the cost of a mid-range appliance and a small bathroom remodel. A gas fireplace insert with liner and masonry surround often sits in the middle of that range. A full built-in gas fireplace with framing, venting, wiring, stonework, and mantel can rival a kitchen island project.
Timelines depend on lead times for the unit and stone. Most projects run two to four weeks from permit to final flame, with a few days of active work on site. Weather adds variables if roof work is needed. I schedule chimney inspections and any chimney cleaning service early so there is time to address a cracked crown or a flue tile that needs grinding to pass a liner.
Common surprise costs include upgrading a gas meter if total connected load pushes capacity, adding a new electrical circuit for a blower or accent lighting, and shoring up framing when old walls reveal hidden voids. Building a small contingency, 10 to 15 percent, helps you make measured decisions instead of hurried compromises.
Maintenance and the long view
The day you light that first flame is not the last time you think about the fireplace. Steady, simple care keeps performance high and risk low.
Gas fireplaces ask for annual service. A technician will clean the glass, check the burner and pilot assembly, vacuum the firebox and blower intake, verify vent integrity, and measure pressure. If you own a gas fireplace insert, they will also inspect the liner and cap. If you ever see soot on the glass or detect a sharp odor, shut the unit down and call for service.
Wood inserts demand a routine: burn seasoned wood, inspect the liner mid-season, and schedule chimney inspections at least annually. Creosote accumulates faster during low, smoldering burns. A good chimney sweep will advise whether you need mid-winter cleanings based on your burn pattern. If you search for a west inspection chimney sweep or similar, look for certifications and ask how they document liner condition. Photos are helpful.
Electric fireplace inserts have the lightest maintenance: dust the intake, check connections, and ensure the outlet and breaker remain solid. Modern LED flame units sip power and run for years without service.
During shoulder seasons, run any unit on low for 30 minutes twice a month. This keeps valves lubricated, fans exercised, and any critters disinterested in nesting near warm corners.
A short, practical checklist for owners
- Confirm permit and inspection needs before ordering equipment. Size by heat load, not aesthetics, then confirm the unit fits the room and your venting path. If using an existing masonry fireplace, schedule chimney inspections and cleaning before purchase. Follow clearances to combustibles and mantel specs exactly; adjust design to suit, not the other way around. Plan for future maintenance: accessible panels, removable surrounds where required, and a termination location that can be reached safely.
The first burn: what to expect
The first hour of operation often surprises homeowners. New paint cures, gaskets seat, and a faint odor may appear. That is normal. Open a window, run the unit on medium or high, and let it bake in for 60 minutes. You may see hazing on the glass that wipes away easily once the unit cools.
As the burners stabilize, watch the flame. On gas fireplaces, you want a steady pattern with clear structure. If flames lick the glass or show persistent yellow soot at the tips, the air shutter might need a small tweak. That adjustment should be made by the installer or service tech with a combustion analyzer where possible. For wood inserts, learn your damper and loading routine. A tight pile with kindling on a top-down configuration lights cleanly and warms the flue faster than a log tossed on a smolder.
This is also the moment to feel surfaces. Take a hand to the drywall above the unit and the underside of the mantel after 30 minutes. If they feel hotter than expected, measure with an infrared thermometer and compare to the manual’s surface temperature guidance. Catching a hot spot early lets you adjust a deflector or airflow before it becomes a habit.
When to call a pro, even if you are handy
Many homeowners can demo tile, frame a bump-out, or run low-voltage wire for a remote receiver. Gas and venting work, however, deserve licensed hands. The margin for error is small and the consequences serious. A professional installer lives the details that keep your system stable when the wind shifts or when the house is full of guests and appliances are running hard.
Use skilled help at three points. First, for chimney inspections and any liner work, lean on a certified sweep or chimney contractor. Second, for gas line sizing and connections, hire a licensed gasfitter who will pressure-test the system. Third, for commissioning and adjustments, let the installer set air shutters, verify pressures, and document that the unit operates within spec.
Good tradespeople will also talk you out of trouble. If your desired unit will crowd a return grill, they will suggest moving the grill or choosing a different place. If your mantel vision collides with a clearance, they will redesign rather than wedging a compromise that fails inspection.
Final thoughts from many winter nights
A fireplace installation is a combination of physics, building science, and taste. The choices you make at the start save you from chasing issues later. Be clear about your intent, size to need, honor the vent path, and respect clearances. Use chimney inspections and, where relevant, a chimney cleaning service to give the system a clean baseline. Choose a gas fireplace, a gas fireplace insert, or an electric fireplace insert that fits your home’s constraints and your habits, not just your eye.
Years later, what you notice most is not the BTU spec or the brand. It’s how the room feels on a silent February night, whether the flame comes on when you press the switch, and whether guests gather near the hearth without thinking. Build toward that moment, and the first flame will be the start of many good ones.